


Although the pandemic halted most travel, as of 2024, the airline industry is back in business and, in some places, stronger than ever. But if you haven’t been to an airport since before COVID, things might look a little different today.
You’re probably wondering what to expect and stressing over what you’ll run into during your airport travels. The good news is that safety and security measures have changed in ways that streamline everything from airport transfers to ticket access. Even if you never liked flying before, you could find that you may — dare we say — enjoy the latest changes in commercial airports!
Still, it’s always easier when you know what to expect. Here are 5 tips to help you make your airport travel as stress-free as possible.
1. Prepare Ahead
The more you can do before you get to the airport, the less pressure you’ll feel when you get there.
Preparing ahead always begins with packing, and you can do that a little at a time, starting about a week before your trip. But as with most general things today, “there’s an app for that.” If you’re worried about staying organized enough to remember all the gizmos and gadgets and travel essentials in your suitcase, check out one of the many easy-to-use apps that guide you as you pack for the trip.
Plan your transportation two or three days ahead of time. If you need a ride to the airport, schedule your rideshare and include at least two hours of padding for checking in and security lines. Research parking options if you’ll leave your car long-term at the airport. You may find that off-site parking garages are cheaper and more convenient.
Beginning 24 hours before your flight, download your airline app and check-in online. (You don’t need the app to check in, but many big airlines offer helpful amenities within their app, like luggage tracking and WiFi or entertainment purchases.) When you check in, pay for your luggage to save time and money versus purchasing at the counter.
Download your boarding pass and take a screenshot of it just in case you can’t get on the internet when you need to show the document. If you have an iPhone, you can add your passes to your Apple wallet. Adding your phone number ensures that if there are any delays or gate changes, you’ll be notified by text immediately.
Finally, take a few minutes to ensure your electronic devices are charged if you’ll need them at the airport or on the plane. Download any streaming entertainment to your device.
2. Carry-On Tips
With the extra fees on luggage becoming almost as much as the ticket itself, many people opt to stick with a carry-on suitcase. If this works for you and you can squeeze all your baggage into one backpack or purse that fits under the seat in front of you on the plane, it’s the cheapest way to travel.
However, anything you bring on the plane must meet the airline’s requirements, and these vary. Some airlines are extremely strict about the dimensions of the carry-on bag, so it’s wise to research the policies for yours before packing. Many airlines allow one personal item like a purse and one carry-on, but more and more companies are reducing this to a personal item only.
Your carry-on will undergo a security scan. Make sure there are no liquids or hazardous materials, knives, guns, or other prohibited items. Keep any large electronics at the top of the bag for easy access. Security will likely require them to be removed from your carry-on separately.
Store your travel documents and wallet in an accessible but secure part of your bag, where they’re safe from loss or theft but easy for you to pull out when you need them. Your bag should be in your sight at all times and securely attached to your arm or waist.
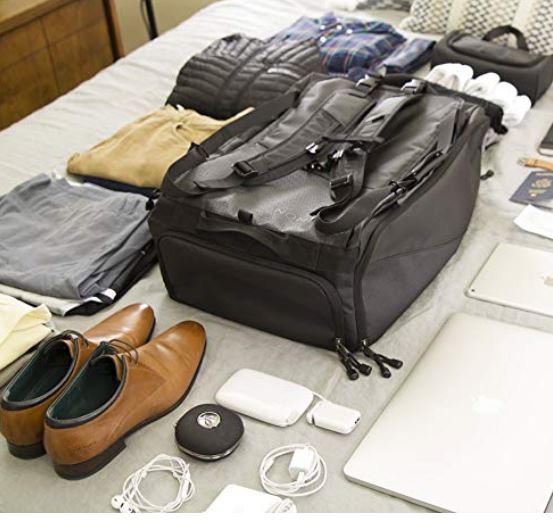
As a pro tip, always pack your carry-on as though your luggage will get lost. This isn’t likely to happen, but it is possible. What will you need to get through the first day of your trip without your suitcase? Pack all of those items in your carry-on. This list might include your prescription medications, a lightweight change of clothes, your contact solution, and a phone charger.
3. Pack and Weigh Your Checked Bag
You might assume that your airline’s checked bag limit is 50 pounds, as it has been for years. However, that weight limit is quickly being reduced to 40 pounds for many carriers. If you go over the weight limit, you can expect to pay upwards of $100 for an oversized bag, so it could be beneficial to check two bags instead of one large one. Pay attention to your bag’s weight before you get to the airport.
Note that you can’t pack cameras, portable phone chargers, or laptops in your checked bag as they have lithium batteries. These must travel in your carry-on. However, you can include liquids, gel deodorants, and other toiletries, but it’s smart to store them in a sealed plastic bag in case they break or spill during travel.
If you’re shopping for a new suitcase, keep in mind that you’ll need to spot it out of the dozens of other travelers’ baggage on the carousel. Bright colors and vivid patterns make yours stand out, or you can attach ribbons, stickers, and other accouterments to identify your bag.
4. Prepare For TSA
The longest part of the airport experience is usually the wait at security. This part can be intimidating, too, but as long as you have all your documents and you haven’t packed any of the prohibited items in your carry-on, you have nothing to worry about.
There are occasional random searches. If you’re pulled aside for one, let the officer know what time your flight leaves, but if you’re running late, don’t assume they’ll just “let you go.” This concern is why airports suggest arriving at least two hours early for domestic flights and adding an hour for international travel.
However, one way to alleviate much of the security stress is to apply for TSA PreCheck well in advance of your travel date. You’ll need to attend an in-person meeting to provide fingerprints and pass a background check. But with this clearance, you can skip much of the line and avoid removing your shoes or unpacking your bags. For international travelers, Global Entry is used for all US partners and the US.
5. Gate Etiquette
No, you no longer have to check in at the counter when you get to your gate (unless you need special accommodations or are on a waitlist). Instead, find a seat, relax, and listen for your flight to be called. You’ll board when your zone or boarding group (marked on your boarding pass) is announced.
Travel etiquette suggests waiting in your seat until you hear your zone. Many people stand in line early, but this blocks the area and confuses other passengers. You won’t miss your flight as long as you are at the gate area, so wait patiently for your group.
Verify that your boarding pass is open on your phone and that your screen brightness is on high so it can be read, or that you have the paper version in your hand. Pack your carry-on and personal item, and head to the line when it’s your turn.
You’ve made it out of the airport, and the right will be smooth flying (minus any turbulence). From here, you’ll be a seasoned airplane pro in no time!


